


- How To Know if Nasturtium Seeds Are Viable - September 23, 2023
- Will a Mandevilla Come Back After a Freeze? - September 22, 2023
- Can You Overwinter Mandevilla in a Garage? - September 22, 2023
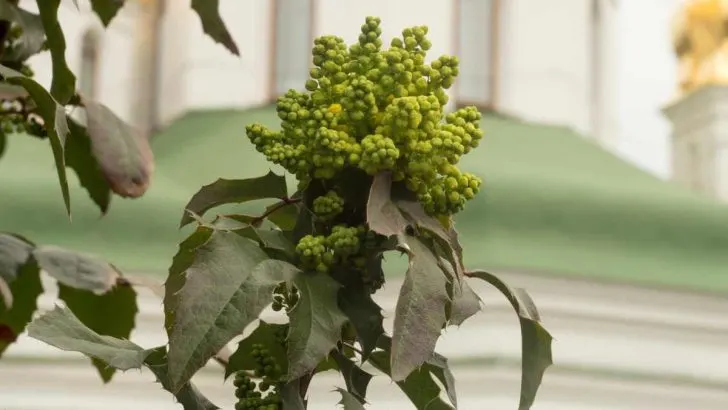
Oregon grape holly is a gorgeous evergreen plant that offers a nice pop of color to your garden and edible berries that make a delicious jam. These plants are durable and easy to take care of. If you want more of this wonderful plant, you can propagate it in a few ways.
You can propagate Oregon grape holly using seeds, stem cuttings, or divisions from a parent plant. For seed propagation, you need to stratify the seeds first, let them germinate, sow them, then plant the seedlings. For the stem cuttings and divisions, cut them carefully, then plant them directly.
Stick around for a complete guide on how to propagate Oregon Grape Holly. I will give a step-by-step explanation and offer you additional tips that will make propagation easier for you.
Propagation by Seeds
Seed propagation is a type of sexual propagation involving the union of the pollen and the egg to create a new young plant (source). The best time to propagate Oregon grape holly using seeds is in the fall when the seeds are mature and have time to germinate until spring.
The process is relatively straightforward, but you need to be careful to follow some essential guidelines:
1. Prepare the Materials
If you’re growing your Oregon grape holly indoors, make sure to get clean pots or trays with drainage holes. You will also need to choose the planting mix you want to use for your seeds.
Oregon grape holly is not too picky when it comes to soil, but it thrives in rich, acidic soil. If your soil is lacking acidity, you can follow our guide to managing alkaline soil.
2. Stratify the Seeds
Oregon grape holly needs to undergo a process called stratification before planting. Stratification basically simulates all the temperature changes that the seed would go through if it were growing in natural conditions in its native location.
To stratify the Oregon grape holly seeds, place them between moist paper towels, moistened peat, or sand inside a sealed container. Put the container in the refrigerator and leave it for three weeks.
3. Sow the Seeds
Put the seeds in the soil, taking care to place them away from one another so that you give them room to grow. Ideally, you should cover the area with a plastic sheet to create a mini greenhouse. This will help the seeds germinate and provide more moisture to the soil.
4. Seedling Stage Care
Germinating can take up to six months for Oregon grape hollies. The plant is underdeveloped and very delicate during this time, so it’s important to keep it moist and warm. Once you see leaves, you can start feeding the plant.
5. Plant the Seedlings
When your Oregon grape holly develops four true leaves, it’s ready to be planted outdoors. If the plant is in a pot/container, move it outdoors, then put it back inside when it gets cold at night if you want it to acclimatize to the outdoors. Otherwise, plant the seedlings on the ground.
Propagation by Stem Cuttings
A super easy way of propagating Oregon grape holly is by using stem cuttings. The best time to propagate this plant using cuttings is around fall.
Here’s how to propagate an Oregon grape holly:
1. Gather Your Tools
First, you need to prepare a pot or container and a potting mix appropriate for Oregon grapes (Oregon grapes are not very fussy, so you’re good with a simple moss and peat mix).
Additionally, you’ll need a sharp knife or scissors and a sharp stick – a pencil will work just as well. All that’s left is to find a nice sturdy Oregon grape holly to provide the stems.
2. Create the Stem Cuttings
Take your knife or scissors and cut a part of the stem, around three to four inches (7.62 to 10 cm). Keep in mind to choose a healthy part of the plant and to cut at an angle to maximize the surface area for potential roots. Take three or more cuttings from your Oregon holly to ensure you have spare cuttings.
3. Clean the Cuttings
Cut or snap some leaves off the stem cutting, taking care not to damage the stem. Leave a few leaves untouched if you can. You should remove the leaves at the bottom so that the underground section is clear.
4. Plant the Stem Cuttings
To plant the stem cuttings, do the following:
- Get the pot or container of your choosing and fill it with the potting mix.
- Use the sharp stick or the pencil to poke a hole a couple of inches deep.
- Place the stem cutting into the hole and put the potting mix around the cutting so it stays upright.
- Place the pot in a place with partial shade (Oregon grape hollies can do fine either in full shade or full sun).
- Make sure to keep the mix moist but well-drained.
5. Plant the Cuttings in the Soil
Test the root development continuously; tug slightly on the cutting, and if there’s resistance, the roots have developed well. If the roots are fully developed, you can transfer the new plant into a pot of fresh soil or your garden. Scoop out the plant using a spoon and transfer it to rich and moist soil.
Propagation by Division of Parent Plants
Oregon grape hollies produce suckers which can turn into a new plant thanks to propagation by division (source). This process basically means digging up the plant and dividing part of it to plant later, thus creating a new plant. You can propagate Oregon grape hollies in a few steps:
- Get your tools ready; a garden spade, a pot or tray, potting mix, and scissors.
- Find the suckers, usually located on the lower part of the stem or near the roots.
- Use your scissors to cut the suckers off carefully, trying not to damage the plant.
- Get a pot or a patch in the garden ready by filling it with rich soil.
- Plant the suckers, giving them lots of space.
- Keep an eye on the soil and make sure it stays moist.
Final Thoughts
Oregon grape holly is a great plant to have in your garden. It’s gorgeous, easy to take care of, and provides edible fruit. You can use seeds, stem cuttings, or divisions from parent plants to propagate it. Whichever method you choose, make sure to ensure the new plant stays moist and protected.
Recommended Reading: