


- Managing Nasturtiums: Controlling Spread and Maximizing Benefits - September 23, 2023
- Is Professional Lawn Care Worth It? I Paid A Pro To Mow My Lawn - September 21, 2023
- Airthereal Electric Kitchen Composter Review – Make Compost Indoors! - July 23, 2023
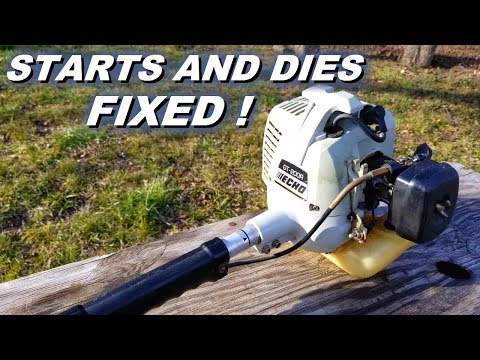
Sometimes a weed eater will start, and even idle just fine, but when you give it gas, it dies. This is often a sign that the engine is struggling to get sufficient amounts of either fuel or air. This article will give you some simple areas to check and explain the reasons why your small engine may be having trouble.
Why does my weed eater die when giving it gas? The most common causes of a weed eater dying when throttled are fuel issues, insufficient air intake, or problems with the exhaust. You should follow the path that the fuel travels to identify the issue.
Note that if your weed eater isn’t starting at all, that could be a different set of issues so be sure to read Gas Weed Eater Won’t Start: Causes and Steps to Troubleshoot.
Let’s get started with the troubleshooting process so that you can get back to your yard work.
Ready for an upgrade? Check out the latest Echo string trimmers (link to Amazon).
Fuel Issues


When it comes to gas-powered weed eaters, the problem often lies with the quality and flow of fuel.
Let’s deal with the obvious first and get it out of the way.
First, make sure you have enough gas in the tank. I know, I know… it seems ridiculous. But we’ve all had that moment of frustration just to realize the tank had nothing but fumes. So check this.
If the tank has plenty of fuel, be sure the primer bulb is filling properly before you start the engine. Sometimes we forget to do this in the midst of working. Blame it on the heat!
And those primer bulbs tend to dry-rot and crack over time so make sure it’s not sucking in air when you depress it.
It’s also possible that the type or mixture of fuel you are using has caused an issue. Know this: Bad gas will sometimes allow a weed eater to start but once you try to rev the throttle, it dies.
As a rule, I strongly recommend using ethanol-free gas in your weed eater. Most manufacturers allow for up to 10% ethanol but it’s not worth the risk. Ethanol can really mess up a small engine.
Your best bet is to opt for a pre-mixed fuel like Husqvarna XP (link to Amazon). It’s ethanol-free, has a high octane rating, and has a much longer shelf life than a homemade fuel mix.
Commercial pre-mixed fuel also has the correct levels of fuel stabilizers and assures a precise gas-to-oil ratio for optimal small engine performance.
Fuel Filter
If you have been using a less-optimal fuel, it’s worth checking your fuel filter.
When a weed eater starts okay but dies when throttled, it often indicates that there is restricted fuel flow. A fuel filter can get clogged with impurities to a point that it allows a small amount of fuel through (enough for starting and even idling) but won’t let it through at a rate sufficient to rev up.
It’s worth checking this and cleaning the filter (or replacing it since they are so inexpensive). And if you do mix your own, make sure your two-stroke oil hasn’t gone bad. It doesn’t last forever like people think it does.
Air Filter
When the fuel has passed through the fuel filter, it enters the carburetor where it’s mixed with air. If your air filter is clogged, it will literally suffocate the engine when you rev the throttle.
Depending on your model, it’s usually just a matter of turning a plastic knob or unscrewing a single screw to remove the air filter cover and gain access. Clean it or replace it depending on the type of filter it is. They are pretty cheap.
Checking the Carburetor
A carburetor is a component in gasoline engines. It ensures air and fuel work together to start a combustion engine. It is also one of the most frustrating parts of a small engine and a big reason that I’ve been seriously considering the benefits of moving to electric yard tools.
Although it’s a fairly simple mechanism, there are a number of things that can go wrong with a carburetor. However, since your weed eater is starting and only dies when giving it gas, that does help us to slim down the potential issues a little.


Now, the obvious issue that you need to check before we get technical is whether or not your carburetor is clogged. I’ve had great success with SeaFoam motor treatment (link to Amazon).
However, there are plenty of carburetor cleaning options on the market. The important thing to remember is to make sure the carb isn’t clogged before proceeding into the next, more technical steps.
Let’s look at these areas of your carburetor:
- The Idle Speed
- The Diaphragm
- The Metering Diaphragm
These are the most common culprits of a carburetor when a weed eater starts but stalls when throttling.
If you want to see this visually, Home Garage has an excellent walk-through video on YouTube that takes you through a lot of what we are going to cover:
1. The Idle Speed
Taking apart a carburetor on a weed eater can feel a little intimidating but it’s actually really simple; you will only need a screwdriver. The concern is with the gaskets. It’s generally best to purchase a carburetor rebuild kit prior to starting.
- The first thing to do is to test the current idle speed of the weed eater. Since the engine turns off shortly after starting your weed eater, the idle speed may just be too slow.
- Find the screw to adjust the idle speed. This is usually behind the air filter, but if you have trouble locating it, consult your user manual.
- Adjust the screw using only ¼ turns before trying to start the trimmer again. This will ensure thorough troubleshooting.
If the weed eater starts up without issue and stays on when you rev the throttle, you have fixed the problem.
On the other hand, if your trimmer starts up, but the engine sounds erratic, you should take apart the carburetor to investigate further. Be sure you drain any fuel from the tank to prevent leaking in later steps!
2. The Diaphragm
Inside one side of the carburetor, there is a diaphragm–a small plastic piece with small flaps–which is what we will focus on during this part of the troubleshooting process.
If the flaps of the diaphragm are bent or worn out, you can replace these easily. You can find the specifications for the diaphragm repair kit in the user manual. Remember you can also find user manuals on the manufacturer’s website in many cases!
You can find carburetor repair kits (link to Amazon) that include diaphragms in hardware stores or dealer service centers as well as online marketplaces. Just search for the make and model you need.
These diaphragms are easy to replace yourself. Simply place the diaphragm flat in the small recess of the carburetor and reassemble the device with the screws you took out earlier.
If this doesn’t remedy your problem, be sure to check out the other side of the carburetor, which we will cover next.
3. The Metering Diaphragm
On the opposite side of the carburetor, there is another set of screws. Unscrew them to assess the condition of the metering diaphragm. This part helps regulate engine speed and should be the consistency of a cotton T-shirt.
This video from The Repair Specialist is a great illustration of the function of the metering diaphragm:

If you find the metering diaphragm is worn out–or even worn through entirely–it will need to be replaced. Once you are done, reassemble the carburetor and test your weed eater.
Clogged Exhaust
This is one of those overlooked areas that make you slap your forehead when you think of it. We tend to focus so much on the fuel and air coming in that we forget the possibility that the problem may be with the air getting out.
I ran across this YouTube video on clogged exhaust problems last fall when a friend and I were working on his weed eater and couldn’t find the issue. Take a few minutes to watch this:

Regular Maintenance
Regular maintenance is important for any piece of lawn care equipment. Maintaining the weed eater will ensure it lasts for years to come and won’t break down when you need it most—or in the middle of working.
Make sure you clean the unit carefully after each job. You can use a damp towel to get any excess grass or debris off. This will prevent rust and issues with buildup.
In addition to wiping the trimmer, a good rule of thumb is to check each of these parts at the end of the season:
- The fuel tank should be free of leaks and filled with quality ethanol-free fuel.
- The fuel filter should be free of impurities.
- The air filter should be clean and porous.
- The carburetor components should be in working order.
- The exhaust should be free of debris.
Checking these parts at the end of the season ensures you can jump right into lawncare come springtime!